©Apple
The new iPhone 17 Pro devices bring huge potential with 48MP now available across all three cameras. But before rushing to fire off shots and filling up storage, it’s worth pausing to consider how to balance image quality with efficient file sizes. That means looking closely at formats and adopting what I call the iPhone photography mindset.
Even experienced iPhone photographers can find this side of things confusing, while newcomers often see it as downright bewildering. With the latest Pro devices and the interface changes in iOS 26, there’s even more to get your head around. The good news is that Apple gives us easy to find options in Settings.
Head to Settings → Camera → Formats and you’ll find the options that shape how your photos are captured and stored.
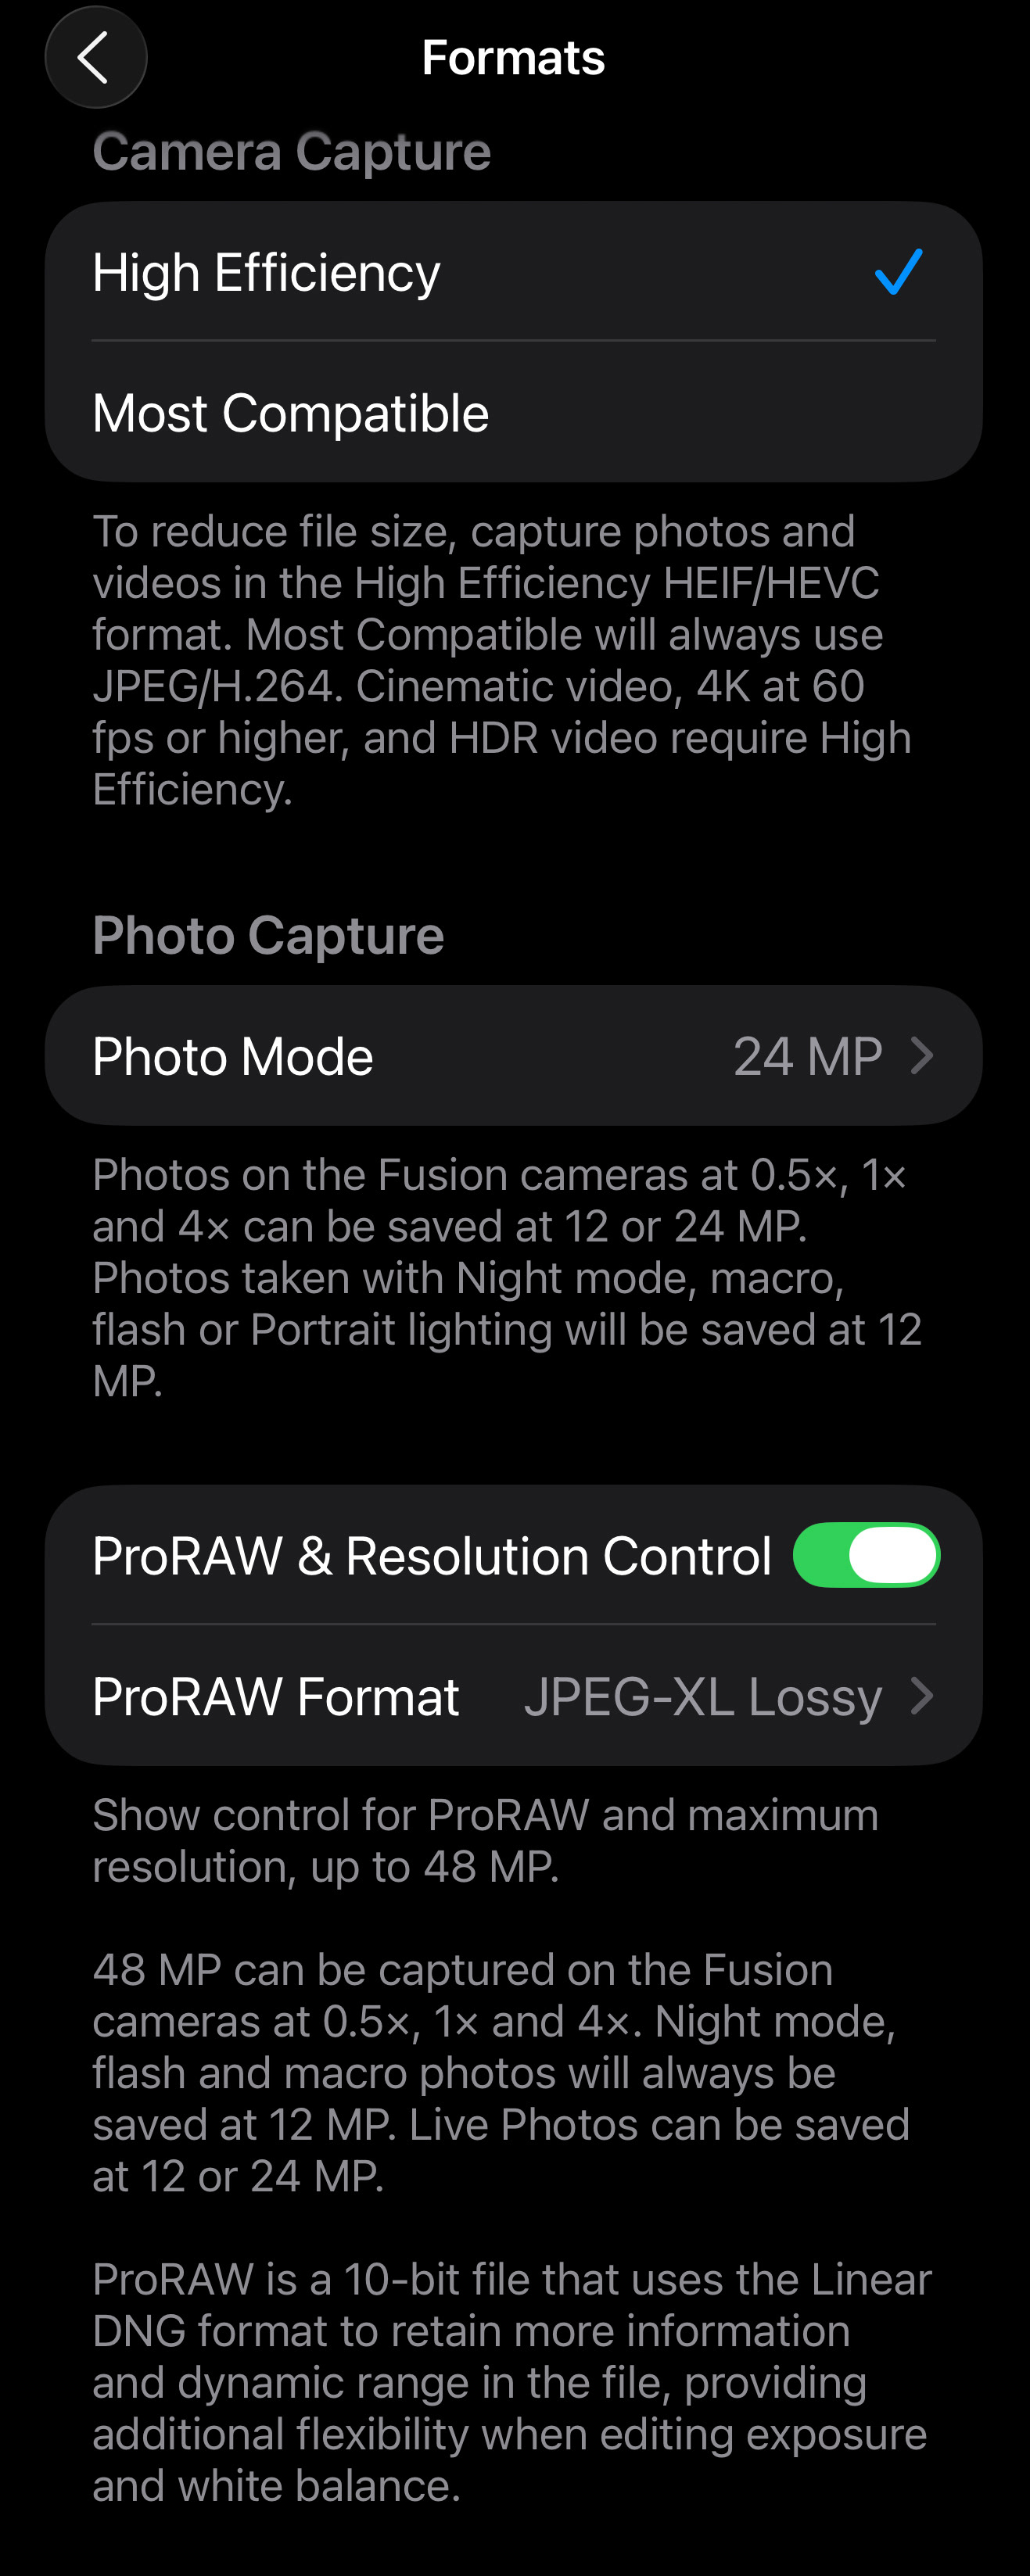
iPhone 17 Pro Camera Format Settings screen
High Efficiency or Most Compatible
The first choice is whether to save in High Efficiency or Most Compatible. High Efficiency uses HEIF (High Efficiency Image Format) for smaller file size photos. Most Compatible uses JPEG. The files are larger, but older devices and workflows accept them without fuss. I would only switch to Most Compatible if I know the workflow at the other end won’t accept HEIF.
What the Heif
HEIF is the High Efficiency Image Format, a modern upgrade to JPEG. It squeezes more quality into smaller files. Apple also talks about HEIC; your files show up as .HEIC. That’s simply Apple’s container for HEIF using HEVC compression. Two names for the same idea: the standard and Apple’s implementation. In practice, you get smaller, cleaner photos that travel easily through the Apple ecosystem.
Photo Capture
Photo Capture decides how many megapixels your photos use. The iPhone 17 Pro’s main camera has a 48-megapixel sensor, but it can save at 24MP by default . That’s good: we don’t always need bigger files chewing up storage. Apple blends the sensor data to give you a detailed, balanced image that’s big enough for prints yet efficient for everyday use. You can go down to 12MP if space is tight, but if you bought the iPhone 17 Pro for serious photography, stepping back to the old standard doesn’t make much sense. The sweet spot is 24MP. If you want every last ounce of detail, you can switch to 48MP when needed, understanding those files are much larger.
ProRAW & Resolution Control
Below Photo Capture is ProRAW & Resolution Control. Turn it on and the Camera gains a RAW toggle; when RAW is on, that frame saves as a .DNG as opposed to your regular HEIF or JPEG shots, and it uses whatever resolution you set in Photo Capture. To understand what that gives you, think of RAW in the traditional sense. On a DSLR or mirrorless, RAW is the digital negative: all the sensor data with minimal processing, intentionally flat and neutral so you decide the look in post.
To compensate for the smaller sensor in an iPhone, Apple blends sensor data with its computational processing before writing the file. The result is ProRAW: still a RAW .DNG you can edit in Lightroom, Photoshop, or Photomator, but one that carries Apple’s intelligence. That’s why the same ProRAW can appear different depending on the editing app. In Photos, you’ll see Apple’s interpretation, already rich. In Snapseed or Lightroom, you’ll see a flatter version closer to the neutral negative. Same .DNG, different presentation. Macro and Night mode can shoot as ProRAW too but the files will be 12MP.
ProRAW Format
Switching on ProRAW changes the way your iPhone saves photos. Because these files can be very large, Apple lets you choose how they’re stored:
JPEG Lossless — the original ProRAW format, often around 75 MB at 48 MP.
JPEG-XL Lossless — same quality, but more efficient, closer to 46 MB.
JPEG-XL Lossy — much smaller files (around 20 MB) with surprisingly little visible compromise.
These options don’t change how your iPhone captures the photo. They only affect how the data is compressed inside the file. Think of it like storing the same negative in different protective sleeves — the sleeve changes, not the negative itself.
For resolution, RAW is straightforward: you can shoot at 12 MP or 48 MP. The default 24 MP images aren’t RAW at all — they’re the HEIF/JPEG versions, designed to balance detail and efficiency. And in certain modes such as night, macro, or 8x telephoto, RAW is capped at 12 MP regardless of your settings.
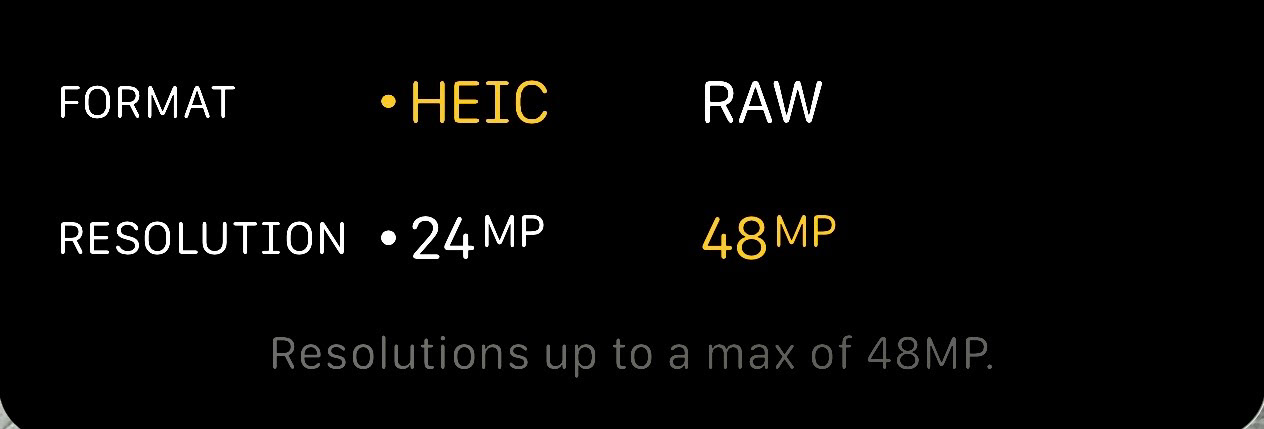
Options for Formats shown in the Camera app
The Purist’s RAW
Some photographers think ProRAW is a compromise. In their view, a true RAW file should be untouched—flat, neutral, and left entirely for them to shape. That expectation comes from years of working with DSLRs and mirrorless cameras, where RAW meant the purest possible starting point.
Recently, apps like Halide’s Zero Processing and Adobe’s Project Indigo have introduced new ways of handling RAW on the iPhone. They strip back or refine Apple’s pipeline to give photographers files that feel closer to traditional RAW.
I don’t see this as a question of right or wrong, just choice.
iPhone Photography Mindset
For me, photography works best when the process stays simple. I prefer fewer apps, consistent results, and minimal editing time. That lets me concentrate on making photographs, not managing files. I call it the iPhone photography mindset.
I keep High Efficiency on. I shoot 24MP by default and flip to 48MP when the scene requires it. I use ProRAW with JPEG-XL Lossy for everyday work because the size savings are huge and, in my edits, the differences are negligible. For mission-critical images I switch the ProRAW Format with the lossless option.